- Muhammad Danish
We all know that implementing filters for image processing can be a hassle in native Android. That’s why we prefer to either host the filters on a server or host the deep learning model on a server like Firebase, Hugging Face, or even on our server.
But what if I tell you that you can directly call Python script like image filtering from your Java or Kotlin code? Sounds cool, right?
So, in this blog, I will tell you how you can integrate Python code directly into your Android native code for image processing.
5 Simple Steps for Image Processing on Android
Step 1: Gradle Plugin Setup
Now, in your Android studio, switch from Android view to Project view so that Android Studio can show you all the files in your project. After this, open build.gradle.kts file and write this line as you see in the screenshot below:
id(“com.chaquo.python”) version “15.0.1” apply false

Step 2: Plugin Management
In your project’s settings.gradle.kts file, find the pluginManagement repositories list, and make sure it includes mavenCentral(), as per the screenshot below:
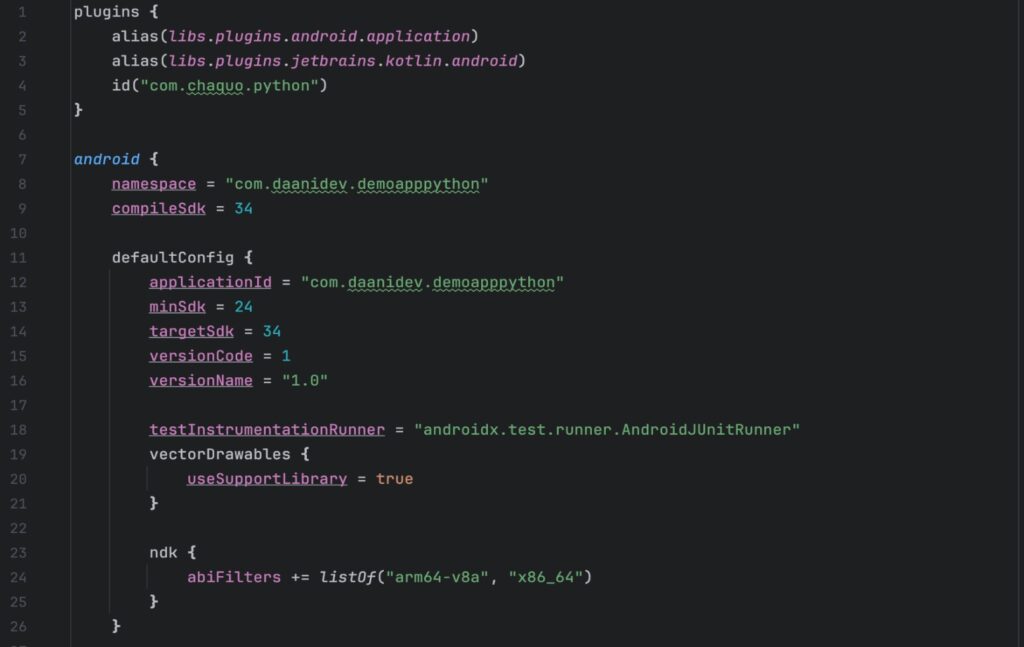
Now, navigate to the app directory file and find the build.gradle.kts. Next, add the Chaqoupy plugin to the build file. Moreover, you need to define the ndk abi filters:
- armeabi-v7a for older Android devices (Python 3.11 and older only)
- arm64-v8a for current Android devices and emulators on Apple silicon
- x86 for older emulators (Python 3.11 and older only)
- x86_64 for current emulators
You can see the ndk filters and plugin in the screenshot below:
Next up, sync the gradle file. After syncing, a new directory will be created named python in your project level.
Step 3: Installing Python Libraries
After this, you need to install the relevant libraries. For example, I want to use open cv and pillow for image processing, so in the app-level gradle file, after the android block, you need to define the following block so that it can install the libraries for you:

Step 4: Adding Python Script
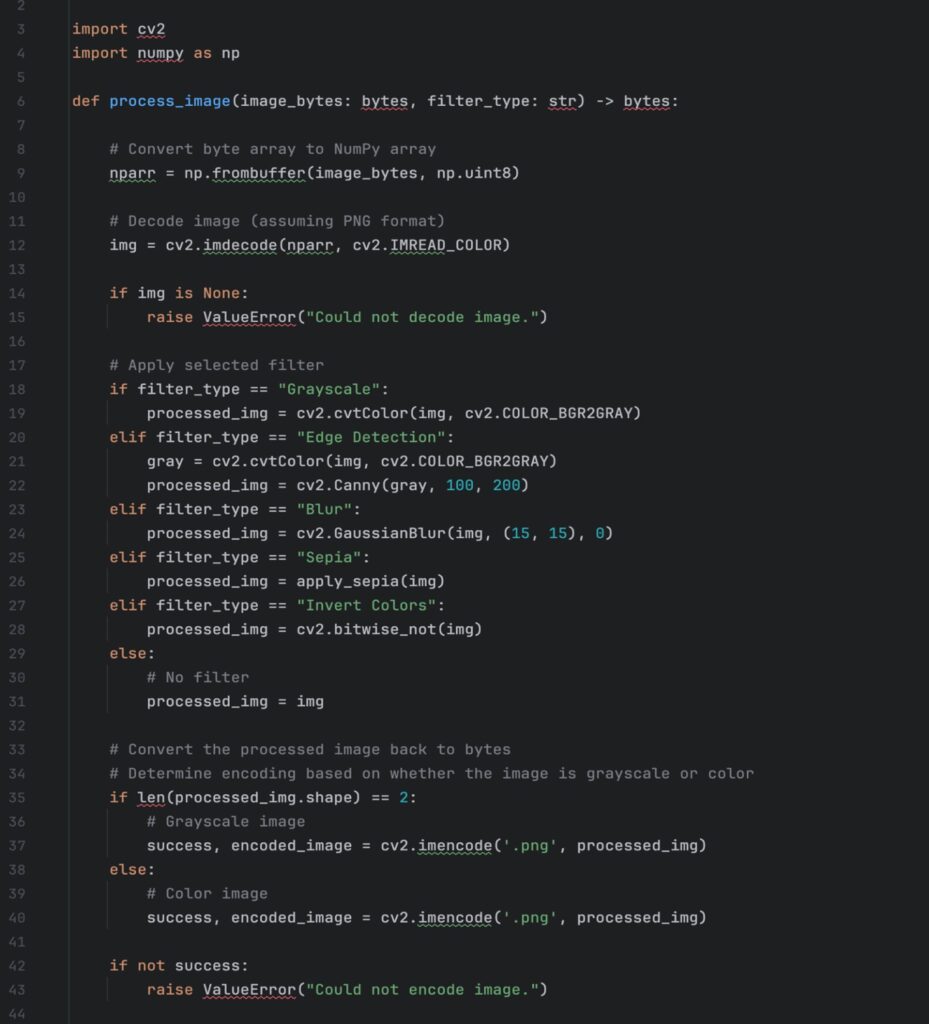
Now, navigate back to the project level and into your Python directory. If not created, then you need to create one named python and create a python file like image_processing.py
After that, you need to define the function in the Python file, for example:
Step 5: Android Client Setup
Once you have done that, you need to go into your activity or fragment and import these from the libraries:
import com.chaquo.python.PyObject
import com.chaquo.python.Python
import com.chaquo.python.android.AndroidPlatform
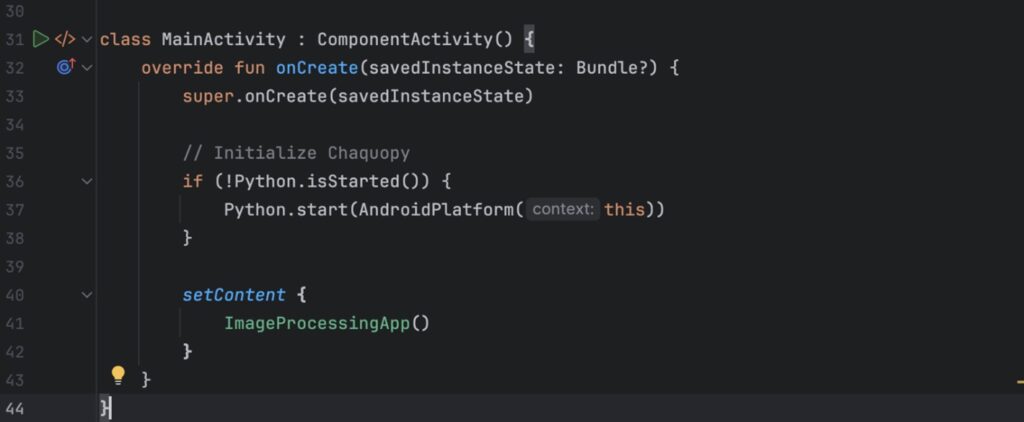
In your activity, implement this check:
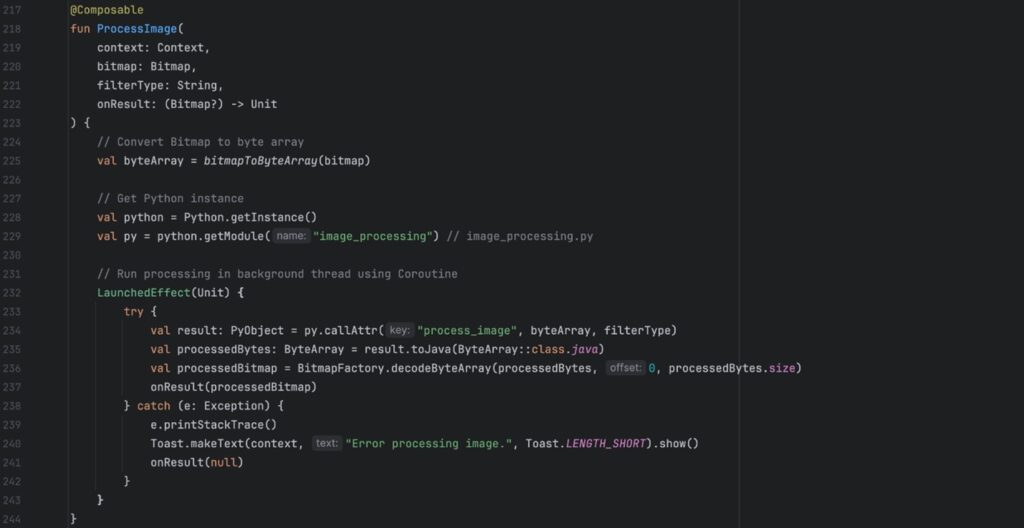
Finally, create the instance using the file name and call the function you just created in your Python file:
Output: Image Processing

Note: Don’t forget to define permission to read and write in the manifest file.
Conclusion
By following these steps, you can effortlessly integrate Python into your Android application, enabling advanced image processing without relying on external servers. This approach combines the best of both worlds: the flexibility of Python for tasks like image filtering and the power of Kotlin and Jetpack Compose for building native Android applications. With this setup, you can significantly enhance the capabilities of your Android app, giving users powerful image editing features right on their devices.

Muhammad Danish
Danish is Senior Software Engineer at TenX
Global Presence
TenX drives innovation with AI consulting, blending data analytics, software engineering, and cloud services.
Ready to discuss your project?
